Laser Cutting Dross: Root Causes, Advanced Diagnostics & Practical Solutions
-
July 24, 2026

-
12 min read

If you have spent any time on the shop floor operating a fiber laser cutting system, you are undoubtedly familiar with laser cutting dross.
Technically speaking, laser cutting dross is the unwanted accumulation of solidified molten metal, metallic oxides, or slag that stubbornly clings to the underside (bottom edge) of laser-cut profiles.
Instead of dropping away cleanly as the laser pierces through, this metal re-solidifies along the lower kerf, turning what should be a finished edge into a rough, jagged tail.
While a little bit of dross might seem like a minor inconvenience, ignoring laser cutting dross actively drains your shop's profitability.
When dross heavily encrusts your parts, automated assembly lines jam, and your team is forced to rely on costly secondary operations focused on secondary deburring reduction in sheet metal fabrication.
Manual grinding, pneumatic sanding, and chemical deburring devour precious labor hours.
Furthermore, dross ruins the dimensional tolerances required for precision welding, resulting in poor joint fit-up, weak structural integrity, and rejected batches that hurt your customer relationships.
Solving this problem requires looking far beyond quick fixes or default machine settings.
In this deep-dive guide, we will unpack the thermodynamic physics of dross formation, thoroughly examine the underlying causes of dross in robotic 3d fiber laser cutting, and walk you through an elite, step-by-step engineering framework to permanently optimize your production quality while exploring true dross-free laser cutting solutions.
To fix dross, we must first understand what happens during a flawless laser cut.
The process relies on a precise, continuous synergy between thermal energy and kinetic force.
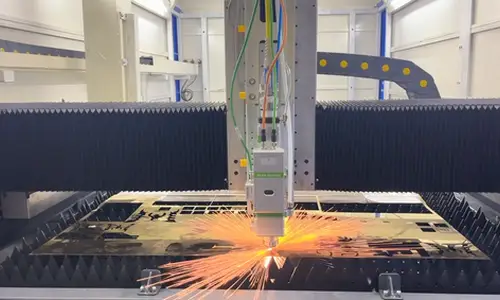
First, the high-power density laser beam focuses onto the material surface, instantly raising its local temperature above the melting and boiling point.
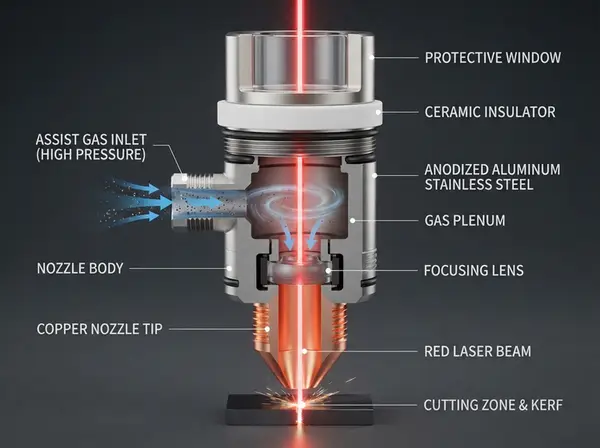
Simultaneously, a coaxial high-pressure assist gas stream (such as oxygen or nitrogen) enters the kerf, exerting massive kinetic momentum.
This gas forces the rapidly liquefied molten metal straight down and completely out of the cut channel.
When power, feed rate, and gas flow are in perfect equilibrium, the molten material vanishes instantly, leaving a pristine edge.
Dross forms the moment this delicate balance between thermal input and mechanical ejection breaks down.
Broadly speaking, this failure manifests in two distinct ways:
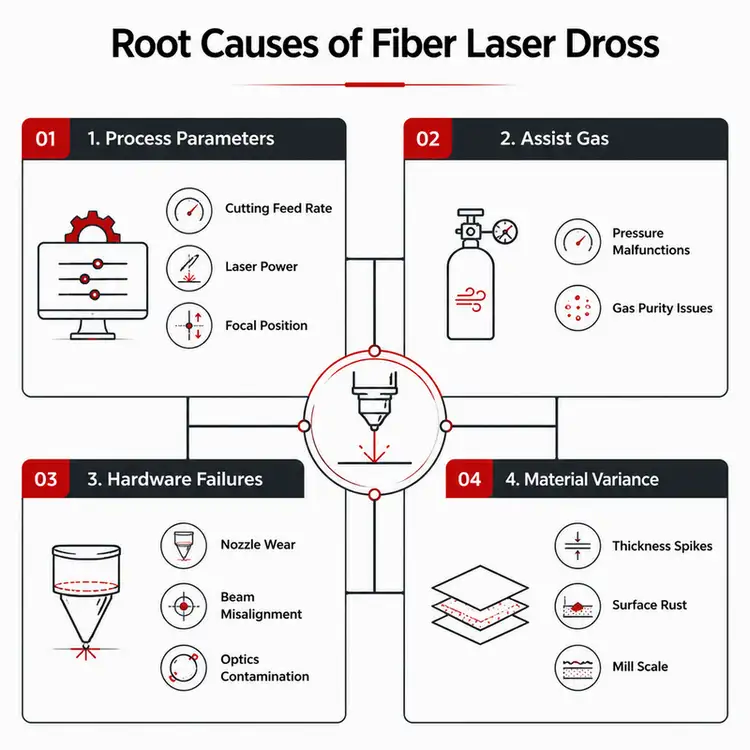
Systematically diagnosing and resolving dross requires analyzing four core technical dimensions of your laser cutting ecosystem, often overlapping with routine fiber laser cutting machine troubleshooting.
Proper laser cutting parameter optimization is your primary weapon against slag accumulation. Even minor deviations can ruin cut quality:
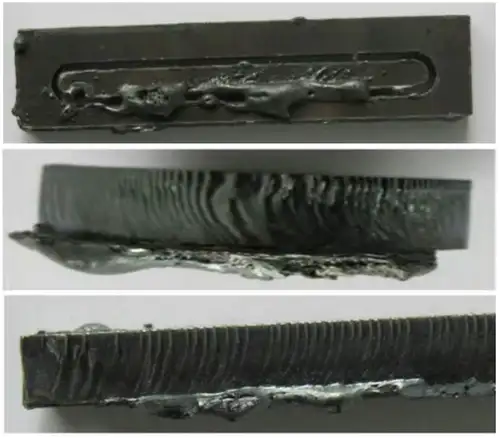
Insufficient power fails to cut through, causing molten residue to accumulate into bumps:
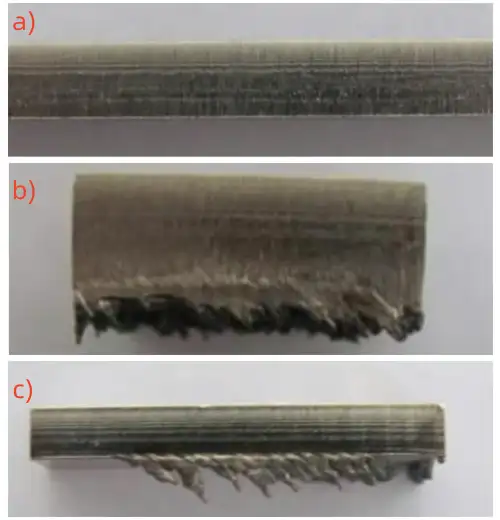
Focus position directly affects surface roughness, kerf taper, and width:
The behavior of your assist gas dictates whether the molten material is cleanly evacuated or trapped:
ometimes, physical wear and tear across your machine components sabotage otherwise perfect parameters during fiber laser cutting machine troubleshooting:
Not all sheet metal is created equal. Variations in raw material quality can completely disrupt your cutting window:
Inconsistent plate thickness, internal laminations, heavy mill scale, or deep surface rust alter the material's thermal conductivity. When the laser encounters a patch of heavy surface rust or a localized thickness spike, the sudden change in resistance stalls the melting process, instantly generating localized laser cutting dross.
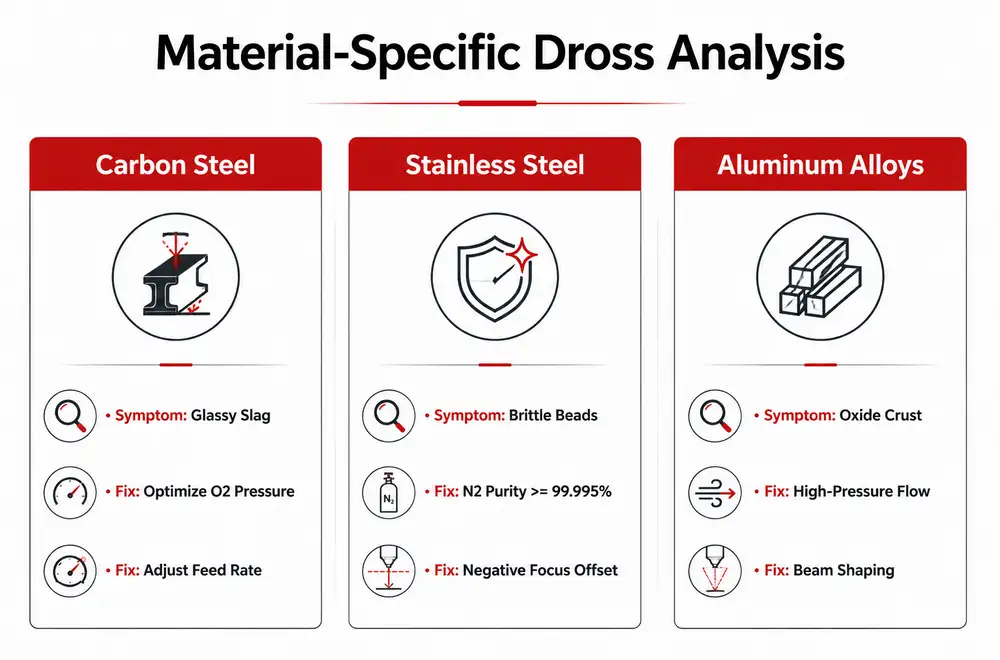
Different engineering materials behave uniquely under a laser beam, requiring specialized approaches to diagnosis and repair as part of implementing true dross-free laser cutting solutions.
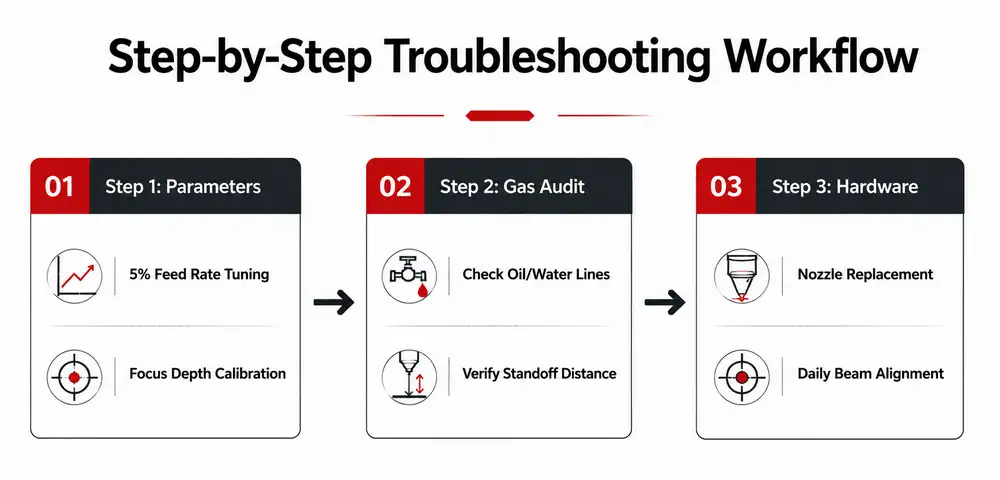
When dross suddenly appears on the production floor, plant engineers and operators should follow a disciplined, step-by-step diagnostic workflow rooted in advanced fiber laser cutting machine troubleshooting.
As modern sheet metal fabrication shifts heavily toward ultra-high-power fiber lasers (10kW to 30kW+), traditional dross troubleshooting methods must evolve.
High-power cutting generates immense thermal energy, making melt-pool control much harder on thick plates.
To combat this, leading machine manufacturers now utilize advanced beam shaping technologies. By using high-power fiber laser beam shaping for thick plate cutting, such as adjustable ring mode (ARM) fibers or core-to-ring power distribution, operators can alter the beam profile in real-time—using the inner core for deep penetration and the outer ring to preheat or widen the kerf, effectively eliminating laser cutting dross.
Furthermore, modern CNC software suites now include intelligent features like dynamic power ramping during piercing, automated lead-in/lead-out path optimization, and micro-joint management to prevent localized thermal shock and slag buildup on complex contours.
Mastering the eradication of laser cutting dross is not about luck; it is a systematic engineering discipline.
By maintaining pristine optical components, strictly auditing assist gas purity and pressure, and carefully fine-tuning your cutting parameters to match material behavior while deploying efficient dross-free laser cutting solutions, you can completely banish slag from your shop floor.
Preventing dross saves hundreds of hours of grueling secondary labor, protects your profit margins, and ensures your shop consistently delivers world-class, ready-to-weld metal components.
Q1: Why is my fiber laser suddenly leaving heavy dross on the bottom of thin sheets?
A sudden onset of dross on a material that previously cut cleanly almost never points to a parameter issue. Look first for hardware culprits: a contaminated protective lens, a spatter-damaged nozzle tip, or a sudden pressure drop in your facility's oxygen supply line.
Q2: Does a worn or off-center laser nozzle directly cause bottom-edge dross?
Yes, absolutely. A worn or thermally warped nozzle orifice destroys the aerodynamic laminar flow of the assist gas, while an off-center beam starves one side of the kerf, leaving the molten metal without the uniform momentum it needs to exit cleanly.
Q3: How do I adjust my focus position to stop dross on thick stainless steel?
For thick stainless steel, shifting toward a deeper negative focal position moves the highest energy concentration closer to the bottom edge of the plate, keeping the molten metal fluid longer so the assist gas can completely blow it out.
Q4: Is my assist gas pressure too high or too low when continuous jagged dross appears?
Continuous jagged or rough dross often points to assist gas pressure that is either too low to provide enough ejection force, or excessively high, which creates unwanted aerodynamic turbulence and premature cooling inside the kerf.
Q5: What is the minimum nitrogen purity required for dross-free stainless steel cutting?
To achieve completely clean, oxide-free, and dross-free edges on industrial stainless steel, your nitrogen assist gas purity must reach a minimum of 99.995%(grade 4.5). Even a slight dip can form a sticky chromium oxide film that locks dross in place.
Q6: How does cutting speed mismatch affect slag accumulation in mild steel?
Moving too fast prevents the laser from penetrating the lower portion of the sheet, while moving too slow creates an over-melted pool of liquid iron that cools into heavy, difficult-to-remove slag.
Q7: Can high-power fiber laser beam shaping eliminate dross on complex contours?
Yes. Utilizing dynamic beam profile adjustment allows high-power fiber lasers to control energy distribution during sharp corners and complex contours, minimizing thermal distortion and preventing localized dross buildup.
To further optimize your laser cutting operations and deepen your engineering knowledge, explore these related technical resources:





English

French

German

Hindi

Italian

Japanese

Korean

Portuguese

Russian

Spanish
Tell us about your manufacturing challenges.
Our engineers will design a laser solution tailored to your exact requirements.